Google Slides is a good choice whether you want to make a presentation for your business or a slideshow for your classroom. The programmed is available online for convenient access and is comparable to Microsoft PowerPoint in functionality.
Here, we’ll go over the fundamentals of using Google Slides as a novice. Here’s how to use Google Slides, including adding slides, inputting text and images, and displaying your slideshow.
Get started in Google Slides
Visit Google Slides and log in with your Google account to create a presentation. Then, you can build a blank slideshow or utilize a template for a rapid start.
Step 1: Some templates are shown across the top of the Google Slides home page. Select Template gallery to view them all. Choose a template you want to use if you see one.
If not, select Blank to start a slideshow from scratch.
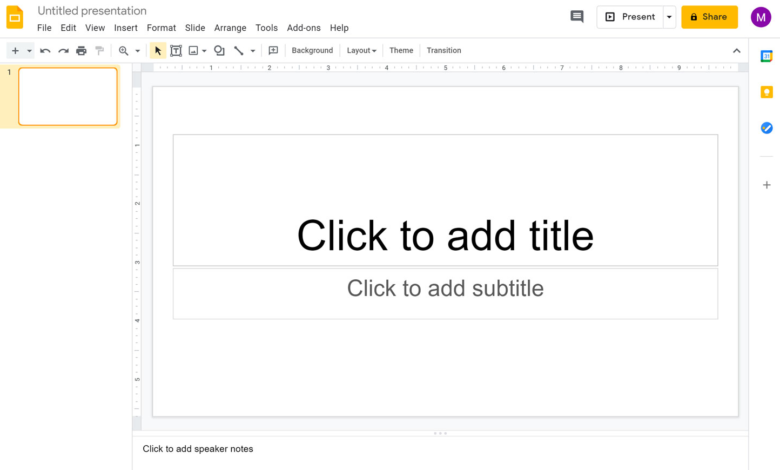
Step 2: When the slideshow opens, head to the top-left corner and give it a name.
For a blank slideshow, the template name is set as the default, and it is “Untitled Presentation.” To save it, just change that text with your own, then hit Enter or Return.
Step 3: Google Slides automatically saves your presentation while you are creating it. You can see that it has been saved to your Google Drive and the date of your most recent modification at the top of the slideshow screen.
Step 4: Selecting the Google Slides logo in the top left corner next to the name will take you back to the main Google Slides screen at any moment.
Use views in Google Slides
Depending on how you wish to work, you can use various views while you develop your presentation.
Step 1: Your slide is displayed in the main view, as seen below, with no side views.
Step 2: Select View > Show filmstrip to display slides on the left as thumbnails. Then, you can utilize the Filmstrip to navigate between the slides in your presentation and right-click a slide to perform an action.
Return to View > Show filmstrip and reject the option to close the Filmstrip.
Step 3: Go to View > Grid display and choose the option to view slide thumbnails on a full screen. This enlarges the view of your slides’ layout and the options for right-clicking actions.
Go to View > Grid view and deselect the option to hide this view.
Add and format slides in a presentation
You’ll add slides to a presentation to develop it. Text, pictures, movies, shapes, and other components can all be included on a slide. You can utilize a pre-made layout to make organizing your slides a little simpler. But you may also use a blank slide to arrange items however you like.
Step 1: To add a slide, do one of the following:
- Select New slide from the list of options under the Insert tab.
- Select New slide from the Slide tab’s top menu by going there.
- Right-click a slide in the Filmstrip or Grid view and select New slide.
Step 2: The new slide has the same layout by default and is positioned after the slide you’ve chosen. If you’d like, you can modify the design of the new slide.
Step 3: To change the layout, select the slide and do one of the following:
- Navigate to the Apply layout section of the Slide tab, then select a layout from the pop-out menu.
- Right-click a slide in the Filmstrip or Grid view, select Apply layout, and then pick a layout from the pop-out menu.
Include speaker notes
You can make notes on your slides that are only visible to you when you present a slideshow that you want to talk through. Similar to using actual index cards during a speech, this is.
Step 1:You may either pull up the notes section using the three dots at the bottom of the slide or choose View > Show Speaker Notes.
Step 2:The area underneath the slide is widened as a result. Put your cursor in the Notes area and type your words there.
Step 3:Select the text in your note and use the Font buttons in the toolbar to change the font style, size, color, or formatting.
Step 4:Drag down until the notes section is hidden to hide the speaker notes area, or select View > Show speaker notes and deselect the option.
Insert and format text on a slide
The pre-made text boxes that come with the layout you choose can be used to add text to your slides. As an alternative, you can include and position text boxes.
Step 1:Simply click inside the text box and start typing to add text. The text is formatted automatically based on the kind of text box. As an illustration, text entered in a title field is formatted with a larger font.
Step 2: Choose the Text box button in the toolbar or choose Insert > Text box from the menu to add a text box of your own.
Step 3: To add a text box to your slide, click a blank area and type your text there.
Step 4: A text box can be moved by dragging it, and its size can be changed by dragging from a corner or edge.
Step 5: Select the text, and then use the font options in the toolbar to alter the font’s style, size, color, or format.
Insert and format images on a slide
Slideshows are visual presentations, thus you should probably include images or photos in addition to text.
Step 1: Pick the arrow next to the Image button in the toolbar or navigate to Insert and select Image.
Step 2: Decide where to put your image. Choose a photo from your computer, the web, Google Drive, Google Photos, a URL, or the camera on your smartphone.
Step 3: After you find and insert the image, drag it to the desired location. To resize it, you can also drag a corner or an edge.
Step 4: Open the Format options sidebar to access additional formatting choices including rotation, position, shadow, reflection, and other modifications.
You may accomplish this by right-clicking the image after selecting it and selecting Format Options from the menu that appears in the toolbar.
Insert other objects on a slide
You can incorporate various kinds of visuals in your presentation in addition to text and pictures. You can include images, audio files, word art, tables, charts, and diagrams.
Step 1: Go to the Insert tab and select the element you want to add to view all of your possibilities.
Step 2: A pop-out menu appears for some things, such as shapes, charts, and lines, allowing you to select the type or style. You can choose the location or input a URL in a pop-up box for other elements like video and audio.
Step 3: Drag an object to the desired location on your slide after inserting it. To see further actions like formatting, alignment, or arrangement with other slide items, you can also right-click the item.
View and present a slideshow
You can review your presentation at any stage of its development and deliver it to your audience in the same manner.
Additionally, you can benefit from the Presenter view, which provides controls and shows your notes. Alternately, just see the slideshow as your viewers will.
Step 1: Choose Presenter view or Start from the beginning from the arrows next to Slideshow in the top right corner of the screen.
Step 2: Your slideshow will appear on one side of your display or second monitor in Presenter view, with a smaller control window floating on top.
To navigate the slides, pause the slideshow, and view your speaker notes, utilise the control window.
Step 3: You will see the presentation in full-screen mode when viewing the slideshow normally, as specified.
To advance through the slideshow or pause it, use the Floating toolbar on the bottom left.
Step 4: To enter or exit full-screen mode, check your speaker notes, start the presentation automatically, or end the show in either of the aforementioned views, choose the three dots on the right side of the floating toolbar.
You have it now! These are the fundamentals for using Google Slides if you’ve never used it before. See how to use Google Sheets for more information.


